Riverside.fm: Everything You Need To Know To Record Your Podcast Remotely
When starting out on their podcasting journey, many of us will turn to Zoom as the go-to platform to record our remote interviews.
And why not?
It’s a tool that everyone is using or has at least heard of nowadays, especially since the events of 2020 and beyond.
But, whilst Zoom is a great conferencing platform, for many, it just doesn’t cut the mustard when it comes to quality audio for podcasting.
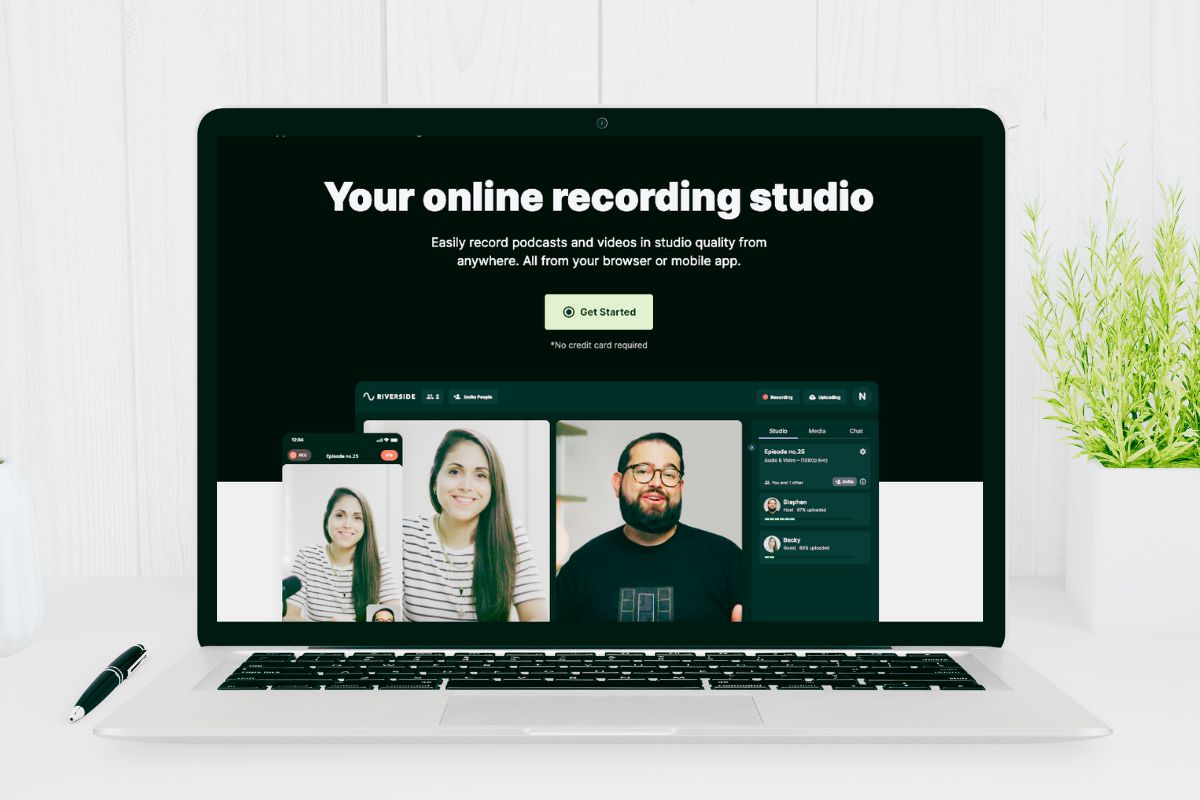
That’s where Riverside.fm comes in.
Riverside.fm is a user-friendly platform that allows you to record high-quality audio and video content remotely.
With its easy-to-use interface and advanced features, Riverside.fm is quickly becoming the go-to choice for podcasters looking to record their shows remotely.
In this beginner’s guide to recording your podcast remotely with Riverside.fm, we’ll take a deep dive into the platform’s features, how to set up your recording, and how to get the most out of your audio and video content.
So, whether you’re a seasoned podcaster looking for an alternative recording platform, or just getting started with your podcast, this guide will provide you with everything you need to know to make the most of Riverside.fm and create amazing content for your listeners.
Riverside.fm at a glance
Just in case you don’t want to read this whole post (and we’d recommend that you do, because, you know, we wrote it!), here’s a quick overview of Riverside.fm:
- Record independently or with guests
- Plans start from $0 per month
- Transcription of episode automatically included on all plans
- Create clips for social media with ease
- Edit within Riverside using waveform and/or transcription
- Export to Descript and Adobe Premier Pro for editing outside of Riverside
- Download files to edit in your favourite editing software
- Paid plans offer the option for your audience to watch live whilst you record
- Record up to 8 speakers via remote recording and get a separate audio file per speaker
- Screen sharing function
What is Riverside.fm?
Riverside.fm is a cloud-based platform that allows you to record high-quality audio and video content remotely.
It was designed specifically for podcasters and video creators who need a reliable and easy-to-use platform to record their shows remotely. The platform offers a wide range of features that make it easy to record, edit, and publish your content.
One of the main advantages of Riverside.fm is its ability to record high-quality audio and video content.
The platform uses a unique recording process that ensures your audio and video are synced perfectly, even if you’re recording with multiple guests. This means you can create professional-quality content without the need for expensive equipment or a recording studio.
Riverside is easy to navigate, even for beginners, and offers a range of features that make it easy to customise your recording session. Not only can you record within the platform, but you can also edit your content, and create soundbites and clips to promote your episode on your social media channels.
Features of Riverside.fm
Riverside.fm offers a range of features that make it easy to record high-quality audio and video content remotely.
Some of the key features of the platform include:
High-quality audio and video recording
Riverside.fm uses a unique recording process that ensures your audio and video are synced perfectly, even if you’re recording with multiple guests.
This means that you can create professional-quality content without the need for expensive equipment or a recording studio.
User-friendly interface
The platform is easy to navigate, even for beginners, and offers a range of features that make it easy to customise your recording session.
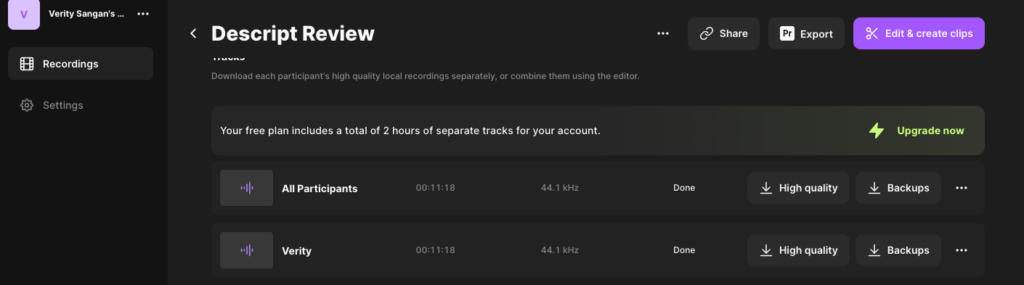
Multi-track recording
Riverside.fm allows you to record each participant’s audio and video separately, making it easy to edit and adjust each track individually.
I talked about the bonus of recording separate tracks when reviewing Zencastr; but, having a track per speaker means that any unwanted sound that appears on their audio only needs to be edited from their track, and won’t affect anyone else’s recording tracks.
This means you can create a professional-quality podcast even if your guests are recording from different locations.
Screen sharing
If you’re recording a podcast that involves screen sharing, Riverside.fm makes it easy to do so.
The platform allows you to share your screen with your guests, making it easy to discuss and analyse content in real-time.
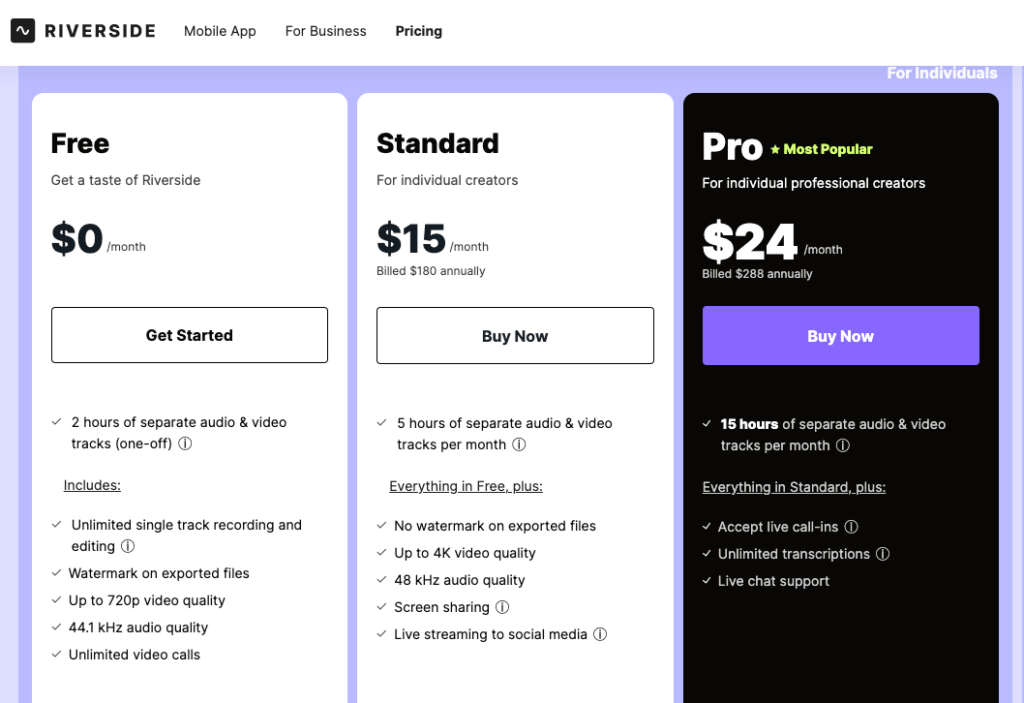
Riverside.fm pricing
Riverside offers a range of pricing options, from $0 to $29 per month, depending on which level of plan you’d like and also if you want to opt for yearly or monthly payments.
The convenience of a mobile app
Recording a podcast remotely can be much more convenient than recording in a studio.
With Riverside.fm, you can record your podcast from anywhere in the world, as long as you have an internet connection. This means you can schedule recordings at a time that’s convenient for you and your guests, without having to worry about travel or scheduling conflicts.
Plus, unlike Zencastr, Riverside has an app that means that you can record on smartphones and tablets, and not just on a laptop or desktop.
How to get started with Riverside.fm
Getting started with Riverside.fm is easy. Here’s a step-by-step guide to setting up your account and recording your first podcast:
Step 1: Sign up for an account
To get started with Riverside.fm, you’ll need to sign up for an account on the platform’s website. The sign-up process is quick and easy, and you can start recording your podcast as soon as you’ve created your account.
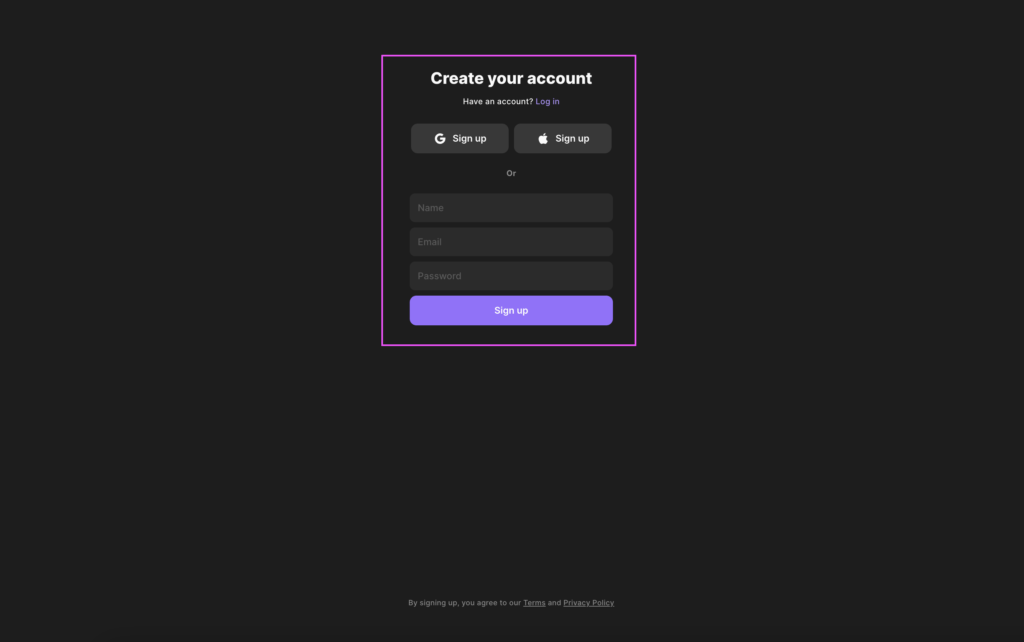
Plus, you can get started for free on their free plan.
During sign-up, you’ll be asked some basic questions. This will help Riverside customise your experience so that it suits your needs best. Plus, it’ll help them understand their customer demographic so that they can continue to improve their already awesome product.
Step 2: Set up your recording session
Once you’ve created your account, you can set up your recording session.

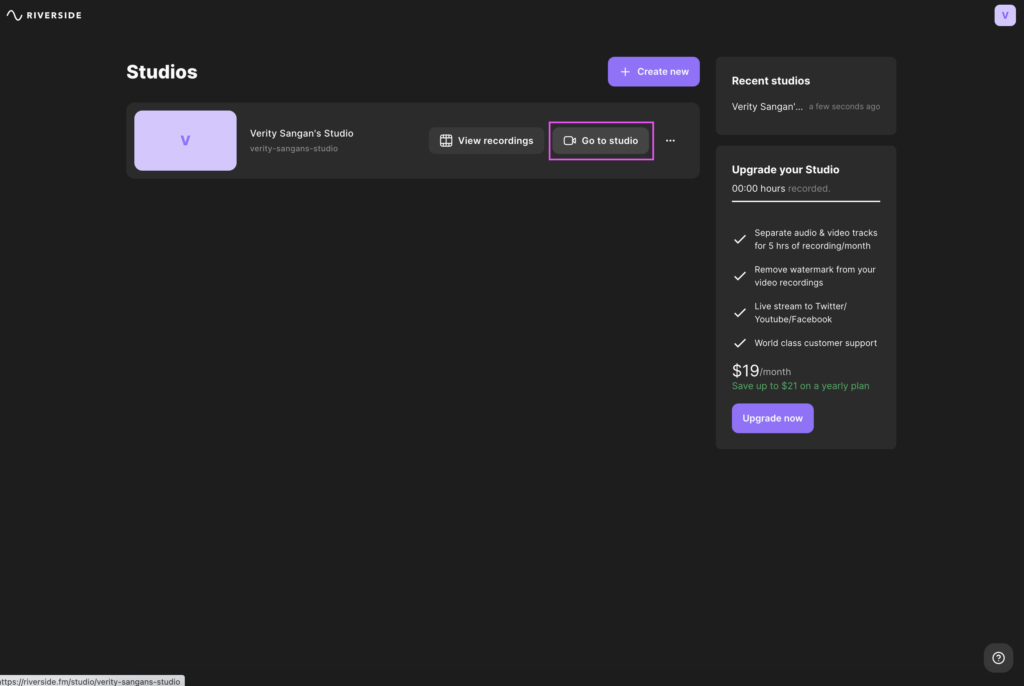
Hover over where you can see your studio and select ‘Go to Studio.’
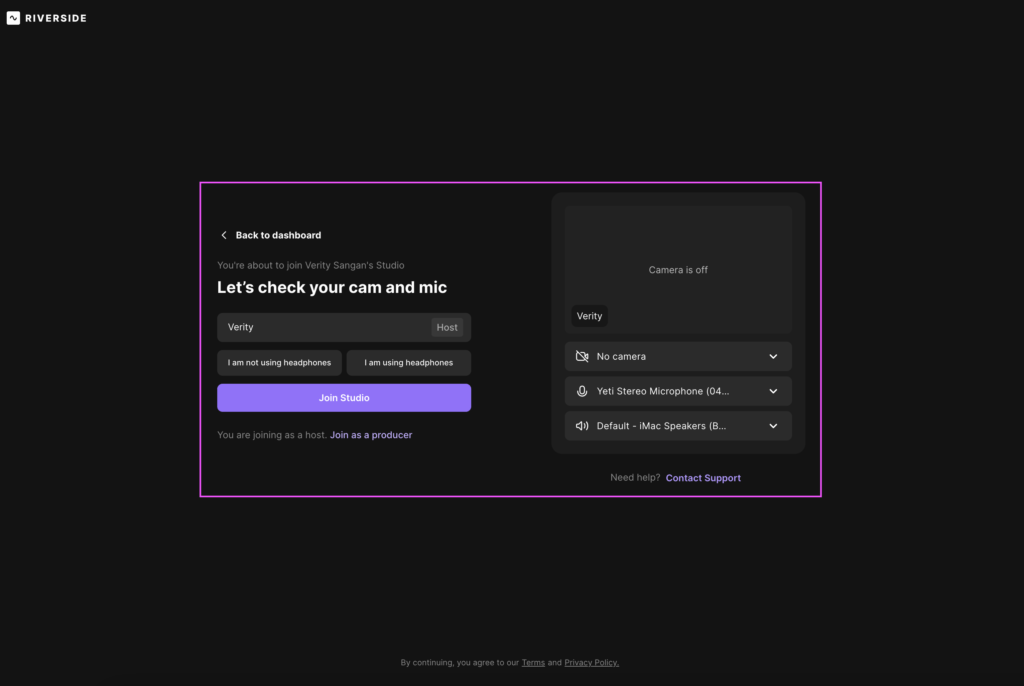
Toggle the settings for your microphone, headphones, and video and then select ‘Join Studio.’
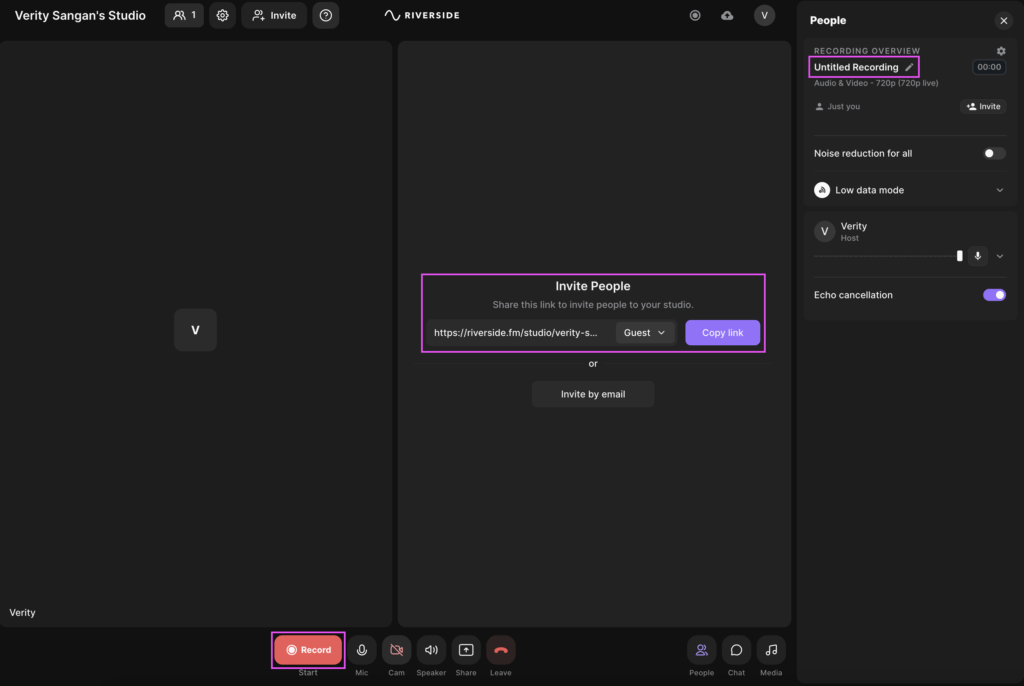
If you need to invite guests to your studio then you can do this by either copying the joining link and sending to them via email/DM, or directly sending the joining link from within Riverside. If you aren’t having a guest on your episode, you can just ignore this information.
On this screen, you can also rename your podcast episode.
You can go more in-depth and choose more recording settings and customising your recording screen as you’d like to. Riverside.fm offers a range of customisation options, so you can create a recording session that’s tailored to your needs.
Step 3: Record your podcast
Once you’ve set up your recording session, you can start recording your podcast.
Riverside.fm will automatically sync your audio and video, ensuring that everything is recorded perfectly.
It really is as easy as hitting ‘Record’ and starting to speak.
Step 4: Edit and publish your podcast
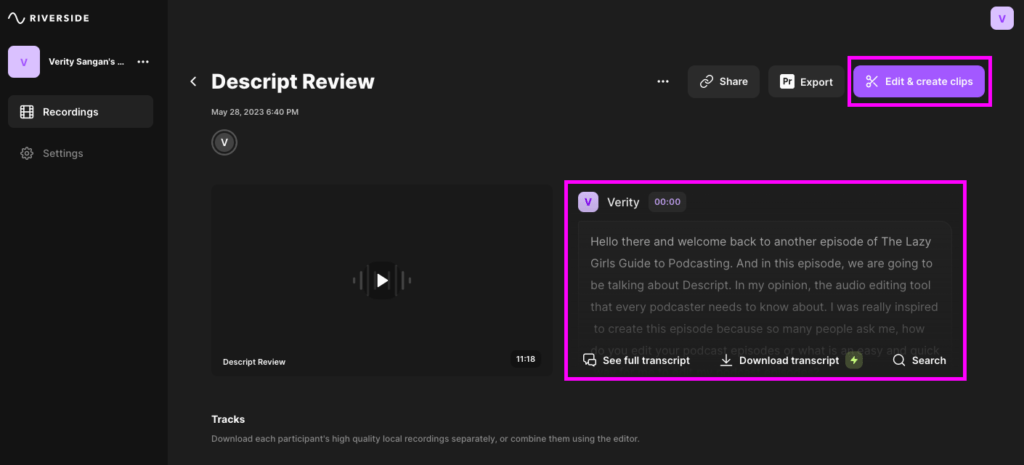
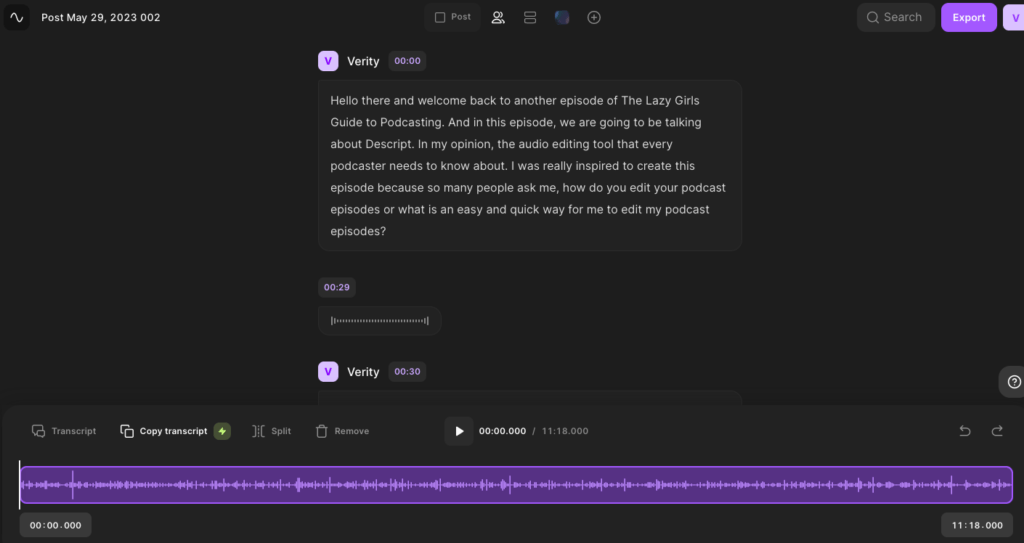
Now you’ve recorded your podcast, you can use Riverside.fm’s transcript tool to edit your podcast, similar to how you would in Descript. Equally, you can edit the waveforms like you would in a tool such as Garageband.
Personally, I love how Riverside gives you both options.
Once edited, you can then export your content in a range of formats, making it easy to publish your podcast on your preferred platform.
Equally, you can download the audio tracks and edit them in your editing tool of choice if you prefer.
You can also create clips of different sizes to share on social media so as to promote your podcast and podcast episodes.
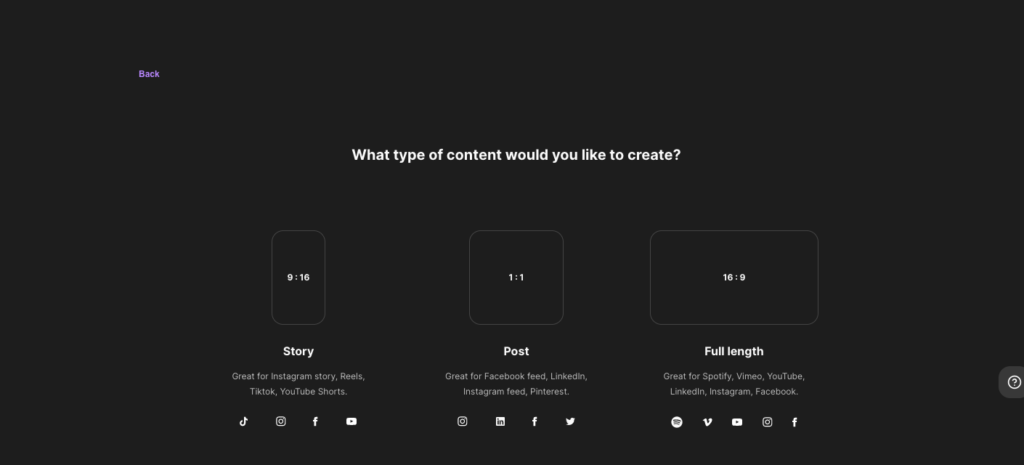
Again, this is super easy to do through editing either the waveforms or the transcript.
Setting up your recording session on Riverside.fm
Setting up your recording session on Riverside.fm is so super easy, making it a great tool for new podcasters, as well as seasoned pros.
Here are some tips to help you get started:
Choose your recording settings
Before you start recording, you’ll need to choose your recording settings.
This includes selecting the video quality, audio quality, and other settings that will affect the recording quality.
Riverside.fm offers a range of options, so you can choose the settings that best suit your needs (remember those questions you answered when signing up?). Also, by selecting the info relevant to you when entering your studio (such as if you’re wearing headphones or not), Riverside automatically adjusts various recording options to give you the best quality sound that it possibly can.
Transcriptions
Riverside will automatically transcribe your episode once recorded. This is an amazing feature that can save you $$$ in fees using other transcription-only tools.
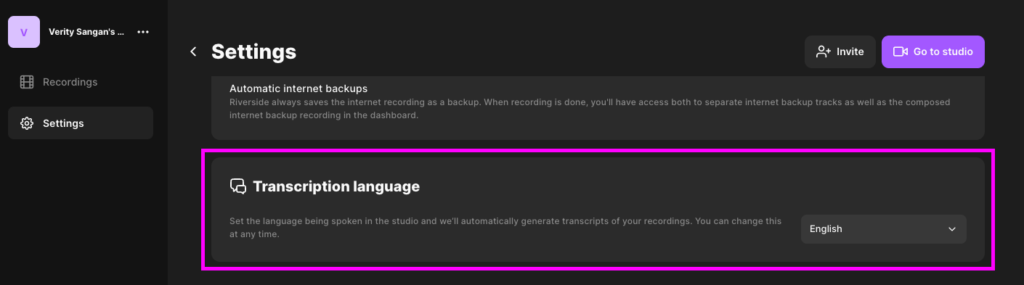
When setting up, you can select which language you want your episode to be transcribed in and Riverside will take care of the rest.
Tips for recording a successful podcast remotely
Recording a podcast remotely can be challenging, but with the right approach, you can create a professional-quality podcast that your listeners will love.
Use a high-quality microphone
To ensure high-quality audio, it’s important to use a high-quality microphone.
This will help to reduce background noise and ensure that your voice is clear and easy to understand.
Test your equipment
Before you start recording, it’s important to test your equipment to ensure that everything is working properly.
This includes testing your microphone, headphones, and internet connection.
It doesn’t matter if it’s the 1st or 101st episode that you’re recording. Testing tech before you hit ‘Record’ can save a lot of headaches down the line.
Choose a quiet location
To reduce background noise, it’s important to choose a quiet location for your recording.
This can be a spare room, a walk-in wardrobe, or any other location that’s free from distractions and background noise.
Yes, Riverside has echo control features and background noise reduction features that you can toggle on. But, at the end of the day, you still need to give Riverside the best recording environment that you can.
Communicate clearly with your guests
When recording remotely, it’s important to communicate clearly with your guests.
Make sure everyone knows when the recording will start, how long it will last, and any other important details.
Some key pointers you might want to communicate with your guests before your recording include:
- If they need to use headphones
- To use the best microphone they can get hold of
- Ensure there are no distracting noises such as traffic, roadworks, or bracelets that might be heard on the recording
- Making sure they know how long you’ll be recording for
- Any key topics that you’ll discuss or ask them about
- If you want them to use plug-in or Bluetooth equipment
Be prepared
Before you start recording, make sure you’re prepared.
This includes having a clear outline for your podcast, any necessary notes or research, and any other materials you may need.
Plus (if you’re me, anyway!) a cup of tea, or another drink of your choice!
Sharing and publishing your podcast episode
Once you’ve finished editing your podcast, it’s time to share and publish your episode.
Choose your hosting platform
Before you can publish your podcast, you’ll need to choose a hosting platform, such as Buzzsprout or Captivate.
Your podcast hosting platform will push your episodes out to the podcast directories that you’ve signed up to. This can include platforms such as Apple Podcasts, Spotify, and Google Podcasts.
Upload your podcast
Once you’ve chosen your hosting platform, you can upload your podcast.
This involves uploading your audio or video file, along with any necessary information such as the title, description, show notes, and artwork.
Promote your podcast
To ensure that your podcast reaches a wider audience, it’s important to promote it on social media and other platforms.
This can include creating social media posts, running ads, and collaborating with other podcasters.
Frequently asked questions about Riverside.fm
Q: Do I need any special equipment to use Riverside.fm?
A: No, Riverside.fm is designed to work with a range of equipment, including built-in microphones and webcams.
Q: Can I record my podcast with multiple guests?
A: Yes, Riverside.fm allows you to record your podcast with multiple guests, and will automatically sync their audio and video.
Q: Can I edit my podcast on Riverside.fm?
A: Yes, Riverside.fm offers a range of advanced editing tools that make it easy to edit on the platform. Equally, you can export your recording straight to Descript or Adobe Premier Pro and edit within there. Not using either of those? You can download the track(s) straight away and edit in other software, such as Garageband.
Q: Can I use Riverside.fm for video recordings?
A: Yes, Riverside.fm allows you to record both audio and video, making it a great option for video recordings.
Conclusion: Making remote podcast recording easy with Riverside.fm
Recording a podcast remotely can be a daunting task, but with the right tools and approach, it’s easier than ever before.
Riverside.fm offers a range of features that make it easy to record high-quality audio and video content remotely.
Whether you’re a seasoned podcaster or just getting started, Riverside.fm is a user-friendly platform that can help you create amazing content for your listeners.
Try Riverside for free today >>
Verity Sangan
Hey! I'm Verity. I love all things podcasting and am passionate about helping more women to find their voice through podcasting. When I'm not working or busy with mum duties, I host Podcasting for Indie Podcasters (formerly The Lazy Girl's Guide to Podcasting).


You May Also Like

Descript: The Audio Editing Tool Every Podcaster Needs
Why You Shouldn’t Use Zoom to Record Your Podcast Episodes, and What To Use Instead
