The Best Budget-Friendly Podcast Microphone for Beginners
Starting a podcast can be a fun and rewarding experience, but it can also be expensive if you get sucked into the promises of expensive equipment making your show the best one out there.
Remember, that Steven Bartlett reportedly started Diary of a CEO with a $100 microphone and his laptop. And that podcast now pulls in a reported £1.2 million in revenue each year. So, whilst it might be tempting to buy the most expensive microphone and accessories out there, it isn’t necessary.
If you’re on a tight budget, finding the right microphone can be a challenge. Luckily, we’ve done the research for you and found the best budget-friendly podcast microphone that will help you produce high-quality audio without breaking the bank.
Why a good microphone is important for podcasting
A good microphone is essential for podcasting because it can make or break the quality of your audio.
Poor audio quality can turn off listeners and make it difficult for them to understand what you’re saying. Don’t get me wrong, the crispest audio isn’t everything. There are plenty of podcasts out there without the best audio, but their content is so valuable to its listeners, that they pull in the downloads regardless. On the flipside though, there are podcasts that I struggle to listen to because of poor audio quality.
A good microphone will help you to capture your voice clearly and eliminate background noise, resulting in a more professional and enjoyable listening experience for your audience. My general advice in this area is to go for the best quality that you can afford, without breaking the bank. I do not believe in recommending anything that will put a new podcaster into serious debt at the beginning of their podcasting journey. To me, no podcast is worth that.
Features to look for in a podcast microphone
When looking for a podcast microphone, there are a few key features to consider.
First, consider the pickup pattern. A cardioid pattern is ideal for solo podcasting, while an omnidirectional pattern is better for group podcasting. Next, look for a microphone with high-quality audio recording capability. You want your podcast to sound professional and clear.
If you want more information of what the pickup patterns mean, check out this graphic from Blue Yeti:
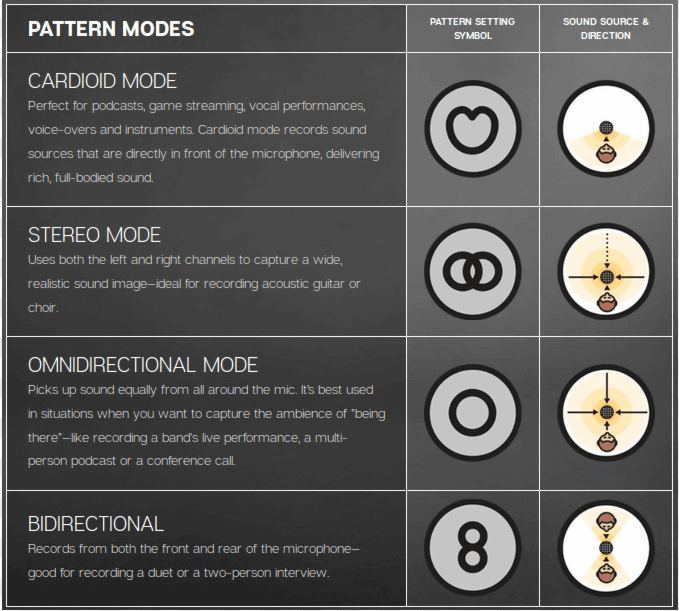
Finally, consider the compatibility of the microphone with your computer’s operating system. In my opinion, the Blue Yeti is a great option that checks all of these boxes and won’t break the bank.
My top pick for a budget-friendly microphone
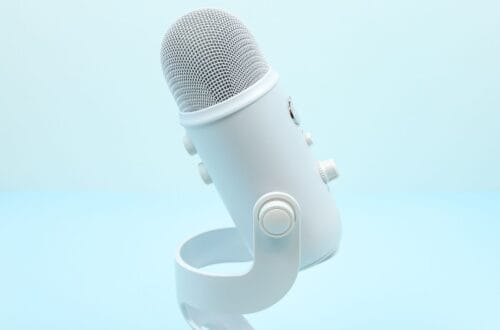
The Blue Yeti is, hands down, my top pick for a budget-friendly podcast microphone for beginners. I’ve raved about it before in relation to recording audio for a podcast, and you can check out that post here.
The Blue Yeti offers high-quality audio recording with its cardioid and omnidirectional pickup patterns, making it perfect for solo or group podcasting. It also has a compact and sleek design, making it easy to transport and set up. Plus, it’s compatible with both Mac and Windows operating systems, making it a versatile option for any podcaster.
At a price point of around £100 (depending on the colour you get), the Blue Yeti is a great investment for you as you start your podcast.
With a Blue Yeti mic, you get clear broadcast-quality vocal sound, along with advanced modulation and HD audio samples that will help you record quality sound wherever you choose to record. The four pickup patterns, including flexible cardioid, omni, bidirectional, and stereo, let you record in a variety of ways, making it perfect for podcasting.
The microphone also comes with audio controls, including headphone volume, pattern selection, instant mute, and mic gain. This puts you in charge of every level of the audio recording and streaming process, ensuring that your sound quality is always perfect. It has a positionable design that allows you to pivot the mic in relation to where you are sitting. This optimises sound quality and tracks your voice in real time with no-latency monitoring.
Plus, the microphone is incredibly easy to set up.
You just connect it to your Mac or PC with the included desktop stand or connect directly to a mic stand or boom arm, open your recording software (we love Garageband or Zencastr!) select ‘Blue Yeti’ as your input and you’re ready to go.
If you record on your iPhone, you can also get a USB to lightning adapter to connect your microphone to your phone for superb recording quality.
Blue Yeti Snowball
The Blue Yeti Snowball is smaller than its big brother and also slightly less costly.
It is also a USB microphone that is ideal for those who are just starting out in content creation or podcasting. Unlike the Blue Yeti, the Snowball only features a single condenser capsule and a cardioid polar pattern. This means it will capture sound coming from in front of the microphone while minimising background noise.
The Snowball is a plug-and-play device that doesn’t require any software or drivers to use, and it is compatible with both Mac and Windows computers.
Setting up your microphone
Once you have your budget-friendly podcast microphone, it’s important to use it effectively to get the best sound quality possible.
First, make sure to position the microphone close to your mouth, but not too close so that it picks up unwanted sounds like breathing or mouth noises. Ideally, you want your mic to be a few inches from your mouth.
Second, adjust the gain or volume levels to avoid distortion or clipping. I spent a good amount of time recording ‘dummy’ episodes so that I could familiarise myself with the microphone settings and adjust my setup accordingly. These can just be a couple of minutes of you talking nonsense or describing what’s around you. It doesn’t matter what the content is. The point is that you’ve got your mic setup and the settings perfected before you ‘record’ on your first episode.
Finally, consider using a pop filter or windscreen to reduce plosives and other unwanted sounds (more on this later on!).
Other audio equipment options to consider
While a microphone is a great place to start, there are other audio equipment options to consider as you grow your podcast.
However, I really want to stress that additional equipment is a luxury rather than a necessity. After a year of podcasting, I am still using headphones that I’ve had for years, and a pop filter remains on my to-buy list without ever actually making it into my Amazon checkout.
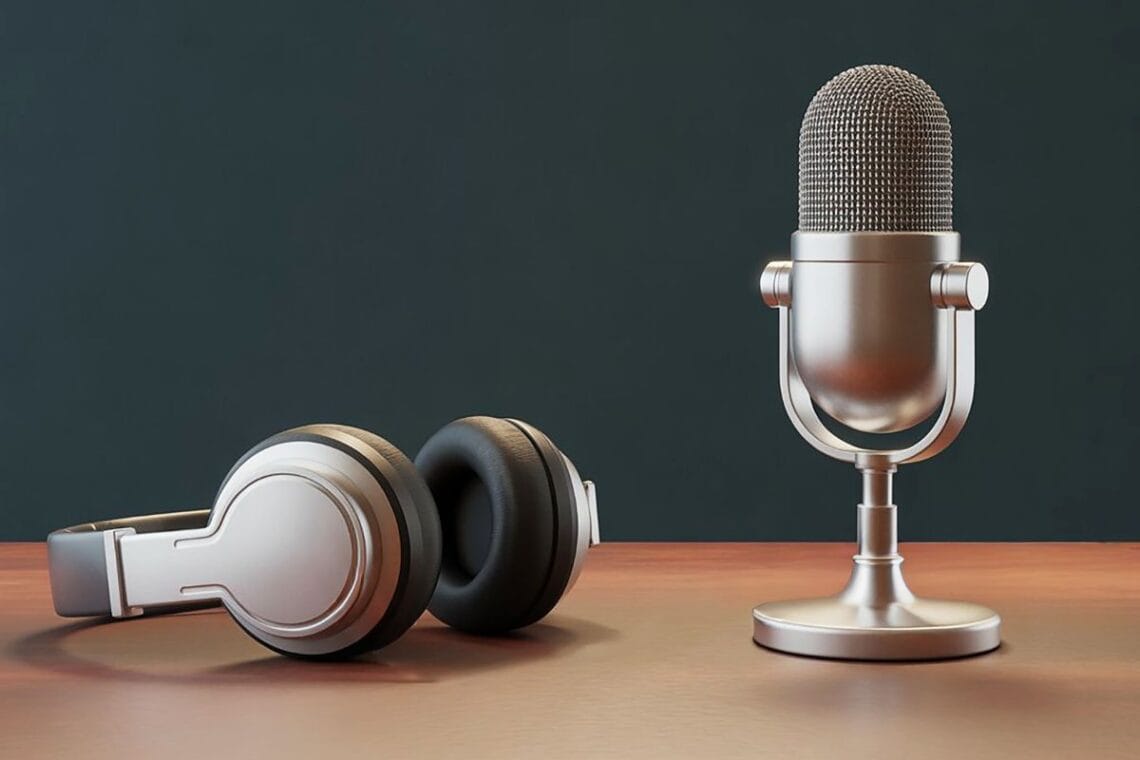
Headphones
A good pair of headphones can help you monitor your audio quality and catch any issues before they become a problem. Depending on how you record your remote interviews, wearing headphones during a recording can also help prevent feedback from occurring on the recording. (Hint: You can vastly improve your remote interview recordings using Zencastr).
When first starting out, there is nothing wrong with using the headphones that came with your iPhone or similar. As long as they have an aux output, they can be plugged into your Blue Yeti microphone, or connected wirelessly to your laptop/desktop.
Microphone stand or boom arm
A microphone stand or boom arm can help you position your microphone more easily and reduce unwanted noise from handling the microphone.
Depending on your podcast setup, a stand or boom arm could be really useful for you. However, also depending on your podcast setup, you might not need one at all.
Pop filter
A pop filter, also known as a pop shield, is an accessory that is often used in audio recording to reduce or eliminate unwanted noise caused by plosives that you make during your recording. Plosives are sharp, explosive sounds that occur when certain letters (such as “P” and “B”) are pronounced. When you make these sounds are made too close to a microphone, they can create a burst of air that can cause a popping or thumping sound in the recording.
A pop filter typically consists of a circular or oval-shaped frame with a layer of thin mesh or foam stretched across it. The pop filter is usually placed between you and your microphone, with the mesh or foam positioned a few inches away from the microphone. When you speak, the pop filter acts as a barrier between the microphone and your plosive sounds, diffusing the burst of air and reducing the impact of the sound on the recording.
Shock mount
A shock mount is used with a microphone to isolate it from vibrations and mechanical noise that can be transmitted through the microphone stand or boom arm. The purpose of a shock mount is to prevent unwanted noise from entering your recording.
A typical shock mount consists of a cradle or suspension system that holds the microphone in place while isolating it from vibrations and other physical disturbances.
Again, depending on your podcasting setup, this may or may not be a useful accessory for you to invest in.
Verity Sangan
Hey! I'm Verity. I love all things podcasting and am passionate about helping more women to find their voice through podcasting. When I'm not working or busy with mum duties, I host Podcasting for Indie Podcasters (formerly The Lazy Girl's Guide to Podcasting).

You May Also Like

How to Rank on Apple Podcasts Search Results in 5 Steps
How to Record Your Podcast Using a Microphone for iPhone