
Zencastr 101: A Beginner’s Guide to Recording Your Podcast
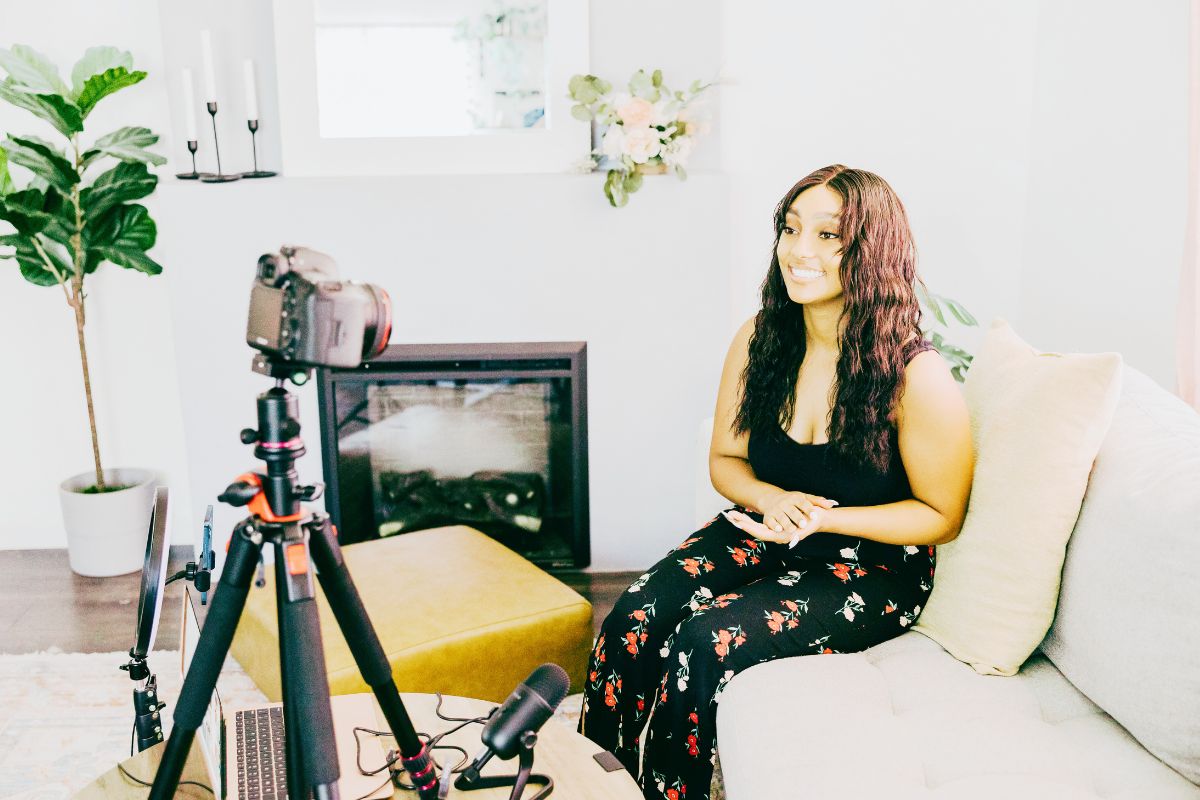
If you’re looking to start your own podcast, you’ll quickly realize that recording high-quality audio can be a challenge.
That’s where Zencastr comes in – it’s a tool designed specifically for podcasters that allows you to record high-quality audio remotely. Personally, I find Zencastr incredibly user-friendly and easier to set up than Zoom. It also has far superior audio and video recording, but more on that later.
When working with a new tool, it can be daunting. That’s why we’ve put together this beginner’s guide to Zencastr, covering everything from setting up your account to recording your first episode. Whether you’re a solo podcaster or have guests joining you remotely, Zencastr makes it easy to create professional-quality audio without ever leaving your home. And I should know, I’ve been using Zencastr to record my remote interviews since episode 13 of The Confident CEO Podcast.
So let’s dive in and discover how Zencastr can help you take your podcast to the next level.
What is Zencastr?
Zencastr is an amazing online tool that allows podcasters to record audio remotely.
The platform was designed with podcasters in mind and offers features that make it easy to produce high-quality audio. With Zencastr, you can record audio from multiple guests, all while maintaining high-quality sound. Zencastr operates entirely online, which means that you don’t need to download any software or worry about compatibility issues.
One of the most significant benefits of using Zencastr is that it allows you to record audio locally. This means that each participant’s audio is recorded on their device, rather than through a shared connection. This helps to eliminate any issues with connection quality and ensures that you’re left with high-quality audio that’s free from any glitches or dropouts.
Zencastr is also incredibly user-friendly. The platform was designed with beginners in mind, so even if you’re new to podcasting, you’ll be able to use Zencastr with ease. The platform features an intuitive interface that makes it easy to navigate, and the setup process is straightforward.
Zencastr pricing
As of May 2023, Zencastr has 4 plans; 2 free, and 2 paid. Personally, I find this quite cool – I’ve never seen 2 free plans on a platform before!
Free plan
The Free plan (which is, obviously, free) gives you the following features:
- 2 hours of Audio and Video Recording
- Unlimited Audio Uploads
- Unlimited Audio Hosting
- Up to 12 Participants per Recording
- 2 hours of Separate Track Recordings
- Record High-Quality 192k MP3
- Audio Embed Player
- Record in 720p Video Quality
- 31 days of Recording Masters Storage
Creator+
Creator+ is the plan that I use for The Confident CEO Podcast (also free) and give you:
- Everything in Free, plus:
- Unlimited Audio and Video Recording
- Record in 1080p Video Quality
- 90 days of Recording Masters Storage
- 1 hour Postproduction Credits / month
- AI Video Layouts
- Unlimited Separate Track Recordings
- Audio and Video Embed Player
- Up to 750 Zencastr Video Views / month
- Zencastr Branding
Professional
The Professional plan is billed at $18 per month, or $216 per year:
- Everything in Free, plus:
- Unlimited 16-bit 48k WAV Recordings
- Unlimited Recording Masters Storage
- Unlimited English Transcriptions
- Unlimited Live Editing Soundboard
- Customize / Remove Watermark
- 1080p Video RSS (750 downloads / month)
- 10 hours Postproduction Credits / month
- Advanced Show Analytics
- Edit with Smart Filters
- Sync with Google Drive/Dropbox
Growth
Finally, there is the Growth plan billed at $45 per month, or $540 per year:
- Everything in Pro, plus:
- Record in 4K Video Quality
- 20 hours Postproduction Credits / month
- 1080p Video RSS (1K downloads / month)
- Up to 10k Video Views / month
- Up to 2 Shows Hosted
- 3 Team Members
- 50k Brand Page Impressions
- Campaign Analytics
- Shortlink Attribution
- Pageview Tracking Attribution
- Automatic Coupon Management
- Campaign Builder
- Conversion Tracking Attribution
- Host-Read Advertising Management
Both the Professional and Growth plans come with a free 14-day trial with no credit card required.
If you need more than what the Growth plan provides, you can contact Zencastr directly and they can put together a bespoke Enterprise plan for you.
Benefits of using Zencastr for podcast recording
There are several benefits to using Zencastr for podcast recording.
First and foremost, Zencastr makes it easy to produce high-quality audio.
The platform was designed with podcasters in mind, which means that it offers features that are specifically tailored to the needs of podcasters.
With Zencastr, you’ll be able to produce audio that’s free from any glitches or dropouts, which is essential for creating a successful podcast. Another benefit of using Zencastr is that it allows you to record audio from multiple guests. This is incredibly useful if you have guests who are located in different parts of the world, as it eliminates the need for them to be in the same physical location. Zencastr also allows you to record audio locally, which helps to ensure that each participant’s audio is of the highest quality.
Recording locally also means that you have a separate audio track for each speaker.
This might sound like a lot of work when it comes to editing, but if anything, it actually makes editing easier. You see, when you’ve got a track per speaker if a noise appears on someone’s track whilst another person is talking (let’s say a car alarm goes off), you can edit that out of that person’s track and it hasn’t affected anyone else’s audio.
Zencastr is also incredibly user-friendly. The platform was designed with beginners, and most importantly podcasters, in mind. In short, it is incredibly easy to use even if you’re new to podcasting. The setup process is straightforward, and the platform features an intuitive interface that makes it easy to navigate.
Zencastr features and how they work
Zencastr offers several features that are specifically tailored to the needs of podcasters. Let’s take a closer look at some of the platform’s key features and how they work.
High-quality audio recording
One of Zencastr’s most significant features is its ability to record high-quality audio.
The platform records audio locally, which means that each participant’s audio is recorded on their device, rather than through a shared connection. This helps to eliminate any issues with connection quality and ensures that you’re left with high-quality audio that’s free from any glitches or dropouts.
It’s not until you switch to a platform like Zencastr that you realise that audio recordings on other platforms such as Zoom, just aren’t quite cutting the mustard when it comes to producing high-quality podcast audio.
Automatic post-production
Zencastr also offers automatic post-production features, which can help to simplify your podcast production process.
The platform automatically levels each participant’s audio, removes any background noise, and normalises the volume levels. This helps to ensure that your audio is of the highest quality, without requiring any additional post-production work.
Personally, I don’t use post-production features when I record in Zencastr. As I’m on the free plan, I only get 1 hour of post-production credits per month (the paid-for plans do give you more post-production credits per month). And considering some of my podcast episodes last around 40 minutes, this isn’t enough for me. But, as I prefer editing in Descript or Garageband, this isn’t a deal-breaker for me.
Live editing
Zencastr offers live editing features, which allow you to edit your audio in real time.
This can be incredibly useful if you need to make quick edits during the recording process, without requiring any additional post-production work. With Zencastr’s live editing features, you’ll be able to edit your audio as you record, which can help to streamline your production process. Another addition which I love is the ability to pause recordings. This is so useful if someone needs a quick break or to take a phone call, for example.
Chat box
Like Zoom and Google Meet, Zencastr has a chat box where podcast participants can chat to each other whilst on a recording together.
This can be super useful if someone has a conversation point they want to cover, for example.
However, if you are using the chat function, do be mindful of where your microphone is, or whether or not it’s on mute. No-one wants to hear keyboard tapping on a podcast, and no-one wants to have to edit that out either.
Virtual green room
Finally, Zencastr features a virtual green room, which allows you to prepare for your recording session before it begins.
The virtual green room allows you to test your audio setup, check your levels, and ensure that everything is working correctly before you begin recording. This can help to eliminate any issues with your audio setup, which can save you time and frustration during the recording process.
Setting up your Zencastr account
Setting up your Zencastr account is a straightforward process.
First, you’ll need to create an account on the Zencastr website. Once you’ve created your account, you’ll be prompted to set up your first recording session.
To set up your first recording session, click ‘+New’ and then ‘Episode.’ From there, click ‘Record episode.’
A dialogue box will pop up; enter the name of the room where you will record the episode. I find it easiest to name the room after my episode guest, or the theme of the episode. The language will default to ‘English,’ but use the drop-down menu if you need to change this. In the ‘Show’ section, you can record in ‘Playground’ if you haven’t yet entered your podcast’s details onto Zencastr. Select if you are going to record video or audio only and then click ‘Create.’
To invite a guest to your recording, click ‘Invite’ at the top of the screen. You can then either enter your guest’s details into the boxes provided and Zencastr will send an email out, or you can click ‘Copy link invite’ and send the web address to the individual themselves.
I prefer to do the second option, as within my correspondence that I send to guests with the Zencastr link I like to give instructions including that they don’t need to create an account, just to click the link at the date and time of our recording, enter their name when prompted and then they’ll see me on screen.
Preparing for a Zencastr recording session
Preparing for a Zencastr recording session is essential to ensuring that your recording goes smoothly. Here are some tips to help you prepare for your recording session:
Test your equipment
Before your recording session begins, it’s essential to test your equipment to ensure that everything is working correctly.
Make sure that your microphone is working correctly, and that your headphones are connected properly. You should also test your internet connection to ensure that your connection quality is sufficient for recording.
Choose a quiet location
When recording with Zencastr, and indeed when recording anything for your podcast, it’s essential to choose a quiet location with minimal background noise.
This will help to ensure that your audio is of the highest quality, without any unwanted background noise. If possible, choose a location with minimal echo, as this can also impact the quality of your audio.
Invite participants early
Make sure to invite your participants to the recording session well in advance.
This will give them plenty of time to prepare and ensure that their equipment is working correctly. Also, make sure that they have a way to contact you should they have any issues such as accessing Zencastr or experiencing a sudden emergency that arises.
How to start and end a Zencastr recording
Starting and ending a Zencastr recording is a straightforward process.
To start a recording, simply click the “Start Recording” button within your project.
Once you’ve started the recording, Zencastr will automatically begin recording each participant’s audio locally.
To end the recording, simply click the “Stop Recording” button within your project.
Once you’ve stopped the recording, Zencastr will automatically upload each participant’s audio to your project, where you can download it for editing. Alternatively, you can download the audio and/or video files straight from the recording room.
You can then upload your files into your favourite editing software (my favourites are Descript and Garageband) and produce your final episode.
Alternatively, if you are on one of the paid plans, you can edit your episode within Zencastr itself.
Troubleshooting common issues with Zencastr
While Zencastr is incredibly user-friendly, there are some common issues that you may encounter during your recording sessions.
Here are some tips to help you troubleshoot common issues with Zencastr:
Poor connection quality
If you’re experiencing poor connection quality during your recording session, try asking your participants to turn off any unnecessary applications or downloads. This can help to free up bandwidth and improve your connection quality.
Echo or background noise
If you’re experiencing echo or background noise during your recording session, try asking your participants to move to a quieter location. You can also try adjusting your microphone levels to reduce any unwanted noise.
Audio quality issues
If you’re experiencing audio quality issues, such as dropouts or glitches, try asking your participants to check their microphone and internet connection.
You can also try adjusting your microphone levels to ensure that each participant’s audio is balanced.
No automated scheduling
This, for me, is the only thing that I can say that Zencastr really falls down on.
If you’re using a tool such as Calendly to schedule your podcast recordings, you can automate a Zoom or Google Meet meeting to send out to your guest and add to both of your calendars. At present, there is no such integration for Zencaster, meaning that you need to manually send a meeting link to your guest.
Whilst this isn’t the biggest downside that a platform has ever had, if you’re an automation junkie like me then you’ll probably find this annoying. However, thanks to Zencastr’s fantastic recording capabilities, this is something that I’m willing to overlook.
Best practices for using Zencastr
Here are some best practices to keep in mind when using Zencastr:
Test your equipment before recording
Before your recording session begins, make sure to test your equipment to ensure that everything is working correctly.
This will help to eliminate any issues with your audio setup and ensure that your recording goes smoothly.
Choose a quiet location
When recording with Zencastr, it’s important to choose a quiet location with minimal background noise.
This will help to ensure that your audio is of the highest quality and free from any unwanted background noise.
Communicate with your participants
Make sure to communicate with your participants before the recording session begins to ensure that everyone knows what recording software you are using. This can help to eliminate any confusion or issues during the recording process. I find that just a quick note of reassurance that they don’t need to create a login or an account with Zencastr, but simply click the link at the time of recording and wait to see me on screen, goes a long way.
Also, if you’re going to record the video, make sure that you warn your guests ahead of time!
Less than 20% of podcasters record video with their audio, so some guests may not be prepared for a video recording. I always think it’s courteous to ask rather than assume when it comes to video recording!
Alternatives to Zencastr for podcast recording
While Zencastr is an excellent tool for podcast recording, there are several alternatives that you may want to consider. Some popular alternatives to Zencastr include SquadCast, Riverside.fm, and StreamYard.
Conclusion
Zencastr is an excellent tool for podcast recording, offering features that are specifically tailored to the needs of podcasters.
With Zencastr, you can produce high-quality audio, record audio from multiple guests, and use features like live editing and automatic post-production. By following best practices and troubleshooting common issues, you can create professional-quality audio without ever leaving your home.
Verity Sangan
Hey! I'm Verity. I love all things podcasting and am passionate about helping more women to find their voice through podcasting. When I'm not working or busy with mum duties, I host Podcasting for Indie Podcasters (formerly The Lazy Girl's Guide to Podcasting).


2 Comments
Harlow Bernard
We just wanted to take a moment to acknowledge all the hard work and effort you’ve been putting in lately. Keep up the amazing job, you’re doing great!
ดูบอลสด
I am truly thankful to the owner of this web site who has shared this fantastic piece of writing at at this place.