Blue Yeti Microphone Settings – How to Record the Perfect Sound for Your Podcast
Table of Contents
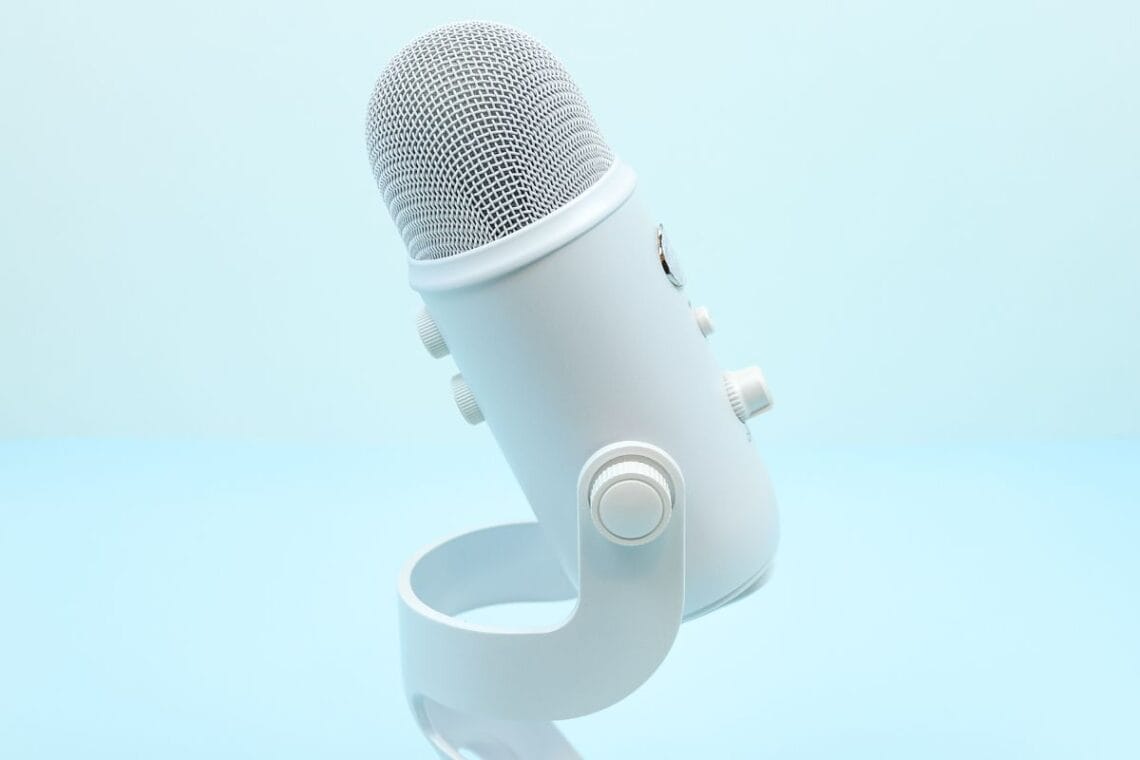
The Blue Yeti microphone is a brilliant budget podcasting microphone, but it can get a bad rep for not being as high-quality as some of its competitors out there.
I think that’s unfair, as the Blue Yeti microphone is a great beginner-friendly microphone for podcasters, especially if you don’t want to spend a lot of money when you’re first setting up your podcast. Costing around $100, it has a variety of functions and is incredibly easy to use. You just have to plug it into your laptop or computer, and you’re ready to go.
It’s also the microphone that I’ve been using to record my podcasts since 2022.
When I was first choosing a microphone for podcasting, I’ll admit, I was a little overwhelmed by the choices when I started the search. Previous to creating podcasts, I’d been creating online courses and was recording the audio for these courses using the built-in microphone on my MacBook.
Yes, I’m hugely cringing writing that.
The audio (to my untrained ear that didn’t know any better) was fine.
But, we grow and we evolve and I now only record audio using a proper external microphone.
When choosing a microphone for recording the sound for my podcast, I went for the Blue Yeti microphone because of its variety of settings available. At the time of purchasing (2022) I couldn’t find another microphone which offered the range that the Blue Yeti microphone did for the same price. And from first use, I have not regretted my microphone decision.
The microphone is easy to use, reasonable in price, and doesn’t require additional software.
Related Post >> Why You Shouldn’t Use Zoom to Record Your Podcast Episodes, and What To Use Instead
Who is the Blue Yeti Microphone Good For?
The Blue Yeti microphone is a brilliant, budget option for a wide range of projects including:
- Podcasting
- Online courses
- YouTube videos
- Streaming
- Gaming
Is The Blue Yeti Microphone Easy to Use?
In my opinion, yes, the Blue Yeti microphone is incredibly easy to use.
It’s a plug and play device, meaning that all you need to do is plug the microphone into your laptop or computer using the USB cable it comes with and you’re good to go. There’s no additional software that is needed. You just need to make sure that your audio input is set to the Blue Yeti microphone in your laptop or computer settings.
It really couldn’t be easier than that.
Do I Need to Install Software to Use the Blue Yeti Microphone?
No, the Blue Yeti microphone is a plug-and-play device. This means that you do not need to install any software in order to use it.
Is the Blue Yeti USB Only?
Yes, the Blue Yeti microphone is USB only, meaning that you will need to use the USB cable that it comes with to plug it into the laptop or computer that you’re recording on.
What Are The 4 Blue Yeti Microphone Settings?
The Blue Yeti microphone has 4 settings: cardioid, stereo, omnidirectional, and bidirectional. Each of these settings is labelled with a corresponding symbol on the microphone.
Each of these symbols relates to a different pattern mode for the microphone. Depending on the source of your sound will depend on which pattern/setting you have your microphone on.

Cardioid Mode
- This mode is best for podcasters, game streamers, voice performers, voice-overs, instruments
- Cardioid more is for sound sources which are directly facing the microphone
Stereo Mode
- This mode gives you a realistic sound-image, for example, choirs, or acoustic guitars
- Stereo mode uses both the left and right channels of the microphone to capture wider sounds.
Omnidirectional Mode
- This mode is best for a multi-person podcast, conference calls, live band performances
- Omnidirectional mode gives the microphone equal input by picking up sound equally from all around the microphone
Bidirectional Mode
- This mode is best for a two person interviews, recording a duet
- Bidirectional mode records from the front and rear of the microphone
Because I use the microphone for recording my voice for videos for my online courses, I use my Blue Yeti microphone in cardioid mode. This means that I sit in front of the microphone when recording.
The output that I get is a full-bodied, rich, and crisp sound, which (in my opinion) sounds professional and of high quality.
Related Post >> 10 Free Podcasting Tools You Need to Try
What Setting Should My Blue Yeti Microphone Be On?
The settings that you choose for your microphone will largely depend on what you’re using your microphone for and where you are recording.
First off, you need to determine your pattern mode. This will be decided on depending on what type of sound you are recording. Check out the infographic above to help you decide on the pattern mode which is relevant to your project.
The microphone also comes with a gain function, mute button, and volume control for headphones which can be plugged into the microphone via an AUX input.
Blue Yeti Microphone Gain Settings
On the back of the Blue Yeti microphone, you’ll see a small knob that you can turn to either increase or decrease the gain of the microphone.
Microphone gain is a setting that controls the sensitivity of the microphone. A higher gain will make the microphone more sensitive and will pick up whispers and breath sounds more, whereas a lower gain means that your microphone is less likely to pick up these more sensitive sounds.
Depending on what you’re recording and how you want the final audio to sound will determine how high (or low) you turn your gain knob to.
I’d recommend doing a few recordings where you’re just saying a few sentences, but recording these sentences with different gain levels. This will help you to decide the best gain for your recording style in the space that you’re recording in.
Related Post >> Descript: The Audio Editing Tool Every Podcaster Needs
4 Tips for Getting the Best Sound Out of Your Blue Yeti Microphone
1. Speak into the Side of the Microphone
Unlike a lot of podcasters and YouTubers who you see speaking into the top of the Blue Yeti, this is not going to get you the best sound. In fact, it could end up sounding like you’re not using a microphone at all.
The Blue Yeti is designed to be spoken into from the side and not from the top. In short, don’t use this microphone like you see singers using microphones on stage.
This won’t pick up the best audio.
Think about singers using old-school microphones that requires them to sing into the side. This is going to get you the best sound out of your microphone.
2. Sit About a Finger-Spread Distance from Your Microphone
If you stretch out your thumb and pinkie finger to their full distance, this is a good measure for how far you should be sitting from your microphone when recording.
This is enough distance for the microphone to not pick up a tonne of plosives or other annoying noises, but close enough to pick up what you’re saying.
3. Don’t Sit Too Close to the Microphone
If in doubt about whether you’re sitting too close or not, move back a few inches.
Sitting too close to any microphone will likely give you distorted audio, which will either be unusable or will take you longer than necessary to edit to get the audio to a decent level to publish.
4. Prepare Your Recording Space
I get it, we can’t all record in beautifully designed and purpose-built studios (that’d be nice!). But we can control the environment where we record our audio:
- Make sure that when you record with any microphone, you do so somewhere that is quiet and free from distraction.
- You might also want to consider wearing headphones when you record.
- Make sure that your microphone is on a solid base (even if this is a bit of a tower of books and boxes to get your microphone to a good height), and check your sound quality before you hit record.
Related Post >> Why Do Podcasters Wear Headphones? 2 Reasons Why You Should
Conclusion
The Blue Yeti microphone does tend to get a bit of a bad rep, but in my experience, this is usually because the person who has a negative review of this microphone is either not recording on it properly, or are expecting the same sort of audio that you could expect from a much more expensive microphone.
Regardless of the mixed reviews out there, it can’t be denied that the Blue Yeti microphone is a true icon when it comes to podcasting microphones, with it often appearing in stock images when you search for either ‘podcasting’ or ‘podcasting microphones.’
In my opinion, it’s a budget-friendly microphone that I’ve happily used for podcasting for the last 4 years, and I’m not in any rush to upgrade or change microphones any time soon.
Verity Sangan
Hey! I'm Verity. I love all things podcasting and am passionate about helping more women to find their voice through podcasting. When I'm not working or busy with mum duties, I host Podcasting for Indie Podcasters (formerly The Lazy Girl's Guide to Podcasting).


You May Also Like

10 Free Podcasting Tools You Need to Try

Capsho Review: How to Generate Your Podcast Content in Under 15 Minutes – with Examples